

Who this is for
This guide is written for Owner and Admin.
Before you begin
- Your organisation's subscription or trial is active. This guide covers the organisation-wide switch, Enable Smart Rostering. Each site then has its own switch. See Prepare sites for Smart Rostering.
- Read the Smart Rostering overview for what the four automatic steps are. The timings below are the dates of those steps.
- You know how many days ahead you want shifts created, and whether staff should be asked which shifts they would like.
Steps
The screenshots show a demonstration organisation with made-up names. Your own screens show your organisation's details. Select a screenshot to open it full size.
-
Go to Configuration > Rostering rules > Organisation Settings
1 In the left menu, choose Configuration.
2 Choose the Rostering rules card. The workspace opens with the tabs Overview, Organisation Settings, Rules & Weights, Sites, Templates, Readiness and Generation Runs.
3 Choose the Organisation Settings tab.
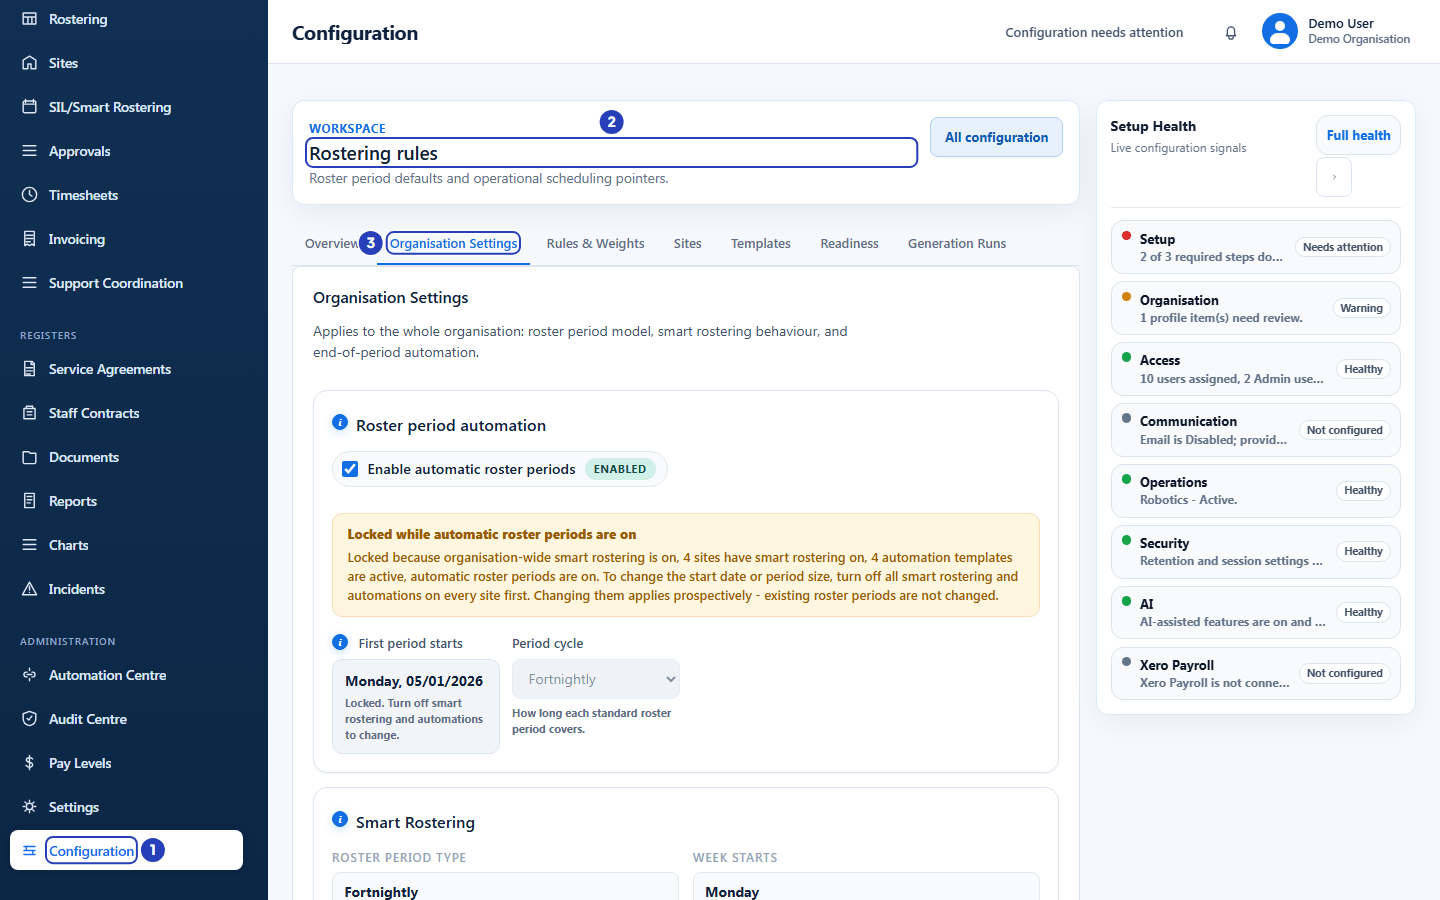
Choose Configuration (1), then the Rostering rules card (2, shown here as the page heading once it is open), then the Organisation Settings tab in the row of tabs (3). -
Check the roster period at the top of the tab
The Roster period automation card sets the cycle that every roster, timesheet and invoice runs on.
1 Enable automatic roster periods lets BondiByte create each new roster period for you.
2 First period starts is the start of the cycle. It must be a Sunday or a Monday.
3 Period cycle is Fortnightly or Monthly.
Important: Once Smart Rostering is on for your organisation, this card is locked and says Locked while automatic roster periods are on. To change the start date or the cycle, turn off Smart Rostering and the automation on every site first. A change applies from the first period you choose and does not change existing roster periods.
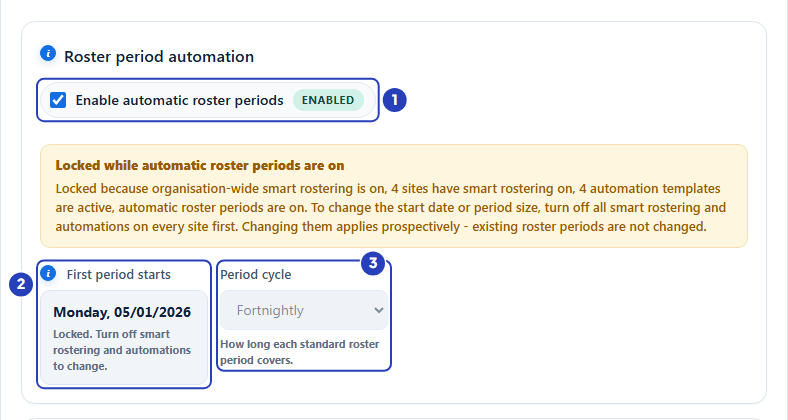
The roster period settings. Check whether automatic roster periods are on (1), the start date of the cycle (2) and the period cycle (3). -
Turn on Smart Rostering and choose the timing
1 Roster period type and Week starts are shown for information. They come from the card above.
2 Tick Enable Smart Rostering. The timing and review options appear below it.
3 In Shift creation lead time, choose how many days before a roster period starts that BondiByte creates its shifts.
4 In Interest request timing, choose when staff are asked which shifts they would like, counted from shift creation.
5 In Shift assignment timing, choose how many days after the interest request BondiByte builds the draft roster.
6 In Publish timing, choose when the roster is published or marked ready for review, counted from shift assignment.
These four choices are the dates of the four automatic steps. For example, with 21 days, 1 day, 6 days and 3 days (the values in the picture), a roster period that starts on Monday 28 September has its shifts created on 7 September, staff asked on 8 September, the draft built on 14 September and the publish step on 17 September.
Fields in step 3 Field What it means Shift creation lead time 14 to 28 days before the roster period starts. A new organisation starts at 21 days. Interest request timing From Immediately after shifts are created up to 3 days after. A new organisation starts at Immediately after shifts are created. Shift assignment timing 1 to 7 days after the interest request. If staff interest is off for a site, it is counted from shift creation instead. A new organisation starts at 3 days. Publish timing From Immediately after shifts are assigned up to 3 days after. A roster is published by itself only for sites where Allow auto-publish is on. A new organisation starts at 1 day. Warning: If you untick Enable Smart Rostering, BondiByte asks Turn off Smart Rostering? Automatic shift creation and assignment stops for the whole organisation. Existing shifts and published rosters are not changed, and you can turn it back on at any time.
Note: The dates are fixed for a roster period when BondiByte first plans it. A change here applies to roster periods planned after you save, not to ones already planned.
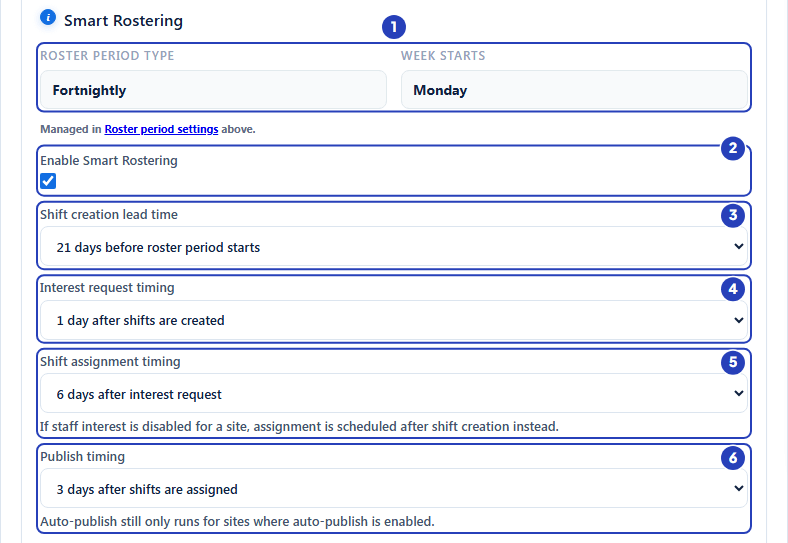
Read the roster period type and week start (1), tick Enable Smart Rostering (2), then choose the shift creation lead time (3), interest request timing (4), shift assignment timing (5) and publish timing (6). -
Choose the review and site options
1 Require manager review is ticked for a new organisation. While it is ticked, every draft roster waits for a person to publish it, and no site can publish by itself. Untick it only if you want BondiByte to publish for the sites that allow it.
2 Allow staff interest lets BondiByte take the optional second step and ask staff which shifts they would like.
3 Allow site overrides lets each site tune the site-level options that are permitted. A new organisation starts with it ticked.
Important: A site that has Allow auto-publish on shows Auto-publish is currently blocked at organisation level while Require manager review is ticked here.
Note: The same tab holds the cards Automatic draft timesheets, Automatic draft client invoices and Clock-in & attendance. They are saved with the same button but are not Smart Rostering settings.
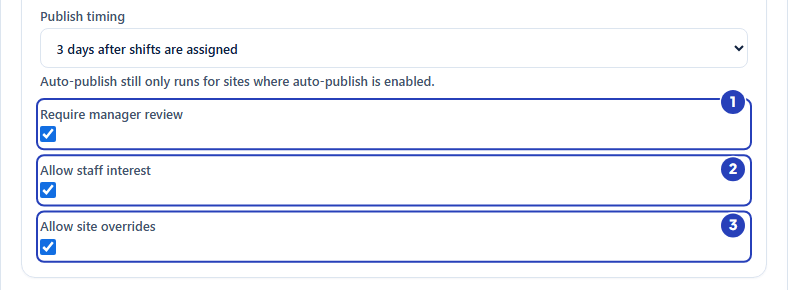
Choose whether a manager must review rosters (1), whether staff interest is collected (2) and whether sites may override (3). -
Choose Save organisation settings
Nothing changes until you save.
1 Choose Save organisation settings at the bottom of the tab. A message confirms Organisation smart rostering settings saved.
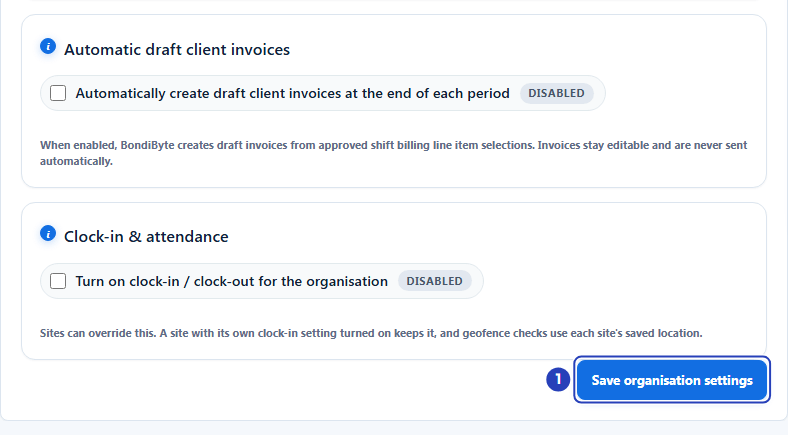
Choose Save organisation settings (1) when you have checked your choices.
What happens next
The settings apply to every site in your organisation.
Roster periods that BondiByte plans from now on use the new timings. The Overview tab shows the planned dates for each site under Upcoming Automation Actions.
Next, switch on each site and link its team. See Prepare sites for Smart Rostering.
Important notes
Important: Keep Require manager review ticked unless your organisation has decided how rosters will be checked. While it is ticked, no roster is published until a person publishes it.
Good practice
- Set First period starts and Period cycle before you tick Enable Smart Rostering. Once Smart Rostering is on, that card is locked.
- Leave enough days between the interest request and shift assignment for staff to answer. Shift assignment timing is counted from the interest request.
- Check the other cards on the tab before you choose Save organisation settings. The button saves them all together.
Troubleshooting
I cannot see the Organisation Settings tab.
Why it happens: Only people who can open the full Configuration page see this tab. Managers and Rostering Officers see only the Overview, Sites and Templates tabs.
What to do: Ask an Owner or Admin to make the change, or to check your role.
The timing and review options are not on the screen.
Why it happens: They appear only while Enable Smart Rostering is ticked.
What to do: Tick Enable Smart Rostering.
I cannot change First period starts or Period cycle.
Why it happens: The card is locked while automatic roster periods, Smart Rostering or site templates are active.
What to do: Turn off automatic roster periods, or turn off Smart Rostering and the automation on every site first, then change the date or cycle. Existing roster periods are not changed.
Save organisation settings is greyed out and its hover text says Resolve the roster period overlap, or acknowledge the coverage gap, before saving.
Why it happens: The new roster cycle you chose would overlap existing roster periods, or leave a gap in roster coverage.
What to do: Choose a different First period starts date. If the gap is expected, tick I understand there will be a gap under the preview message.
A site has auto-publish switched on but its roster is not published by itself.
Why it happens: Require manager review is ticked for the whole organisation, which blocks auto-publish at every site.
What to do: Untick Require manager review here only if your organisation has decided that rosters may publish without a manager checking them, then save.