

Who this is for
This guide is written for Owner and Admin.
Before you begin
- Your organisation's subscription or trial is active, and Smart Rostering automation is switched on in Account settings > Automation & Capacity Controls. It is on unless an Owner or Admin switched it off. If Smart Rostering is not available to your organisation, the Setup tab says Setup progress could not load.
- Your sites, staff and clients have records, and you know the regular shifts you want BondiByte to repeat. You build them by hand on the site's roster in the template step.
- Read the Smart Rostering overview first. It explains what BondiByte does by itself once setup is done.
Steps
The screenshots show a demonstration organisation with made-up names. Your own screens show your organisation's details. Select a screenshot to open it full size.
-
Go to Configuration > Rostering rules > Setup
1 In the left menu, choose Configuration.
2 Choose the Rostering rules card. The workspace opens on the Setup tab until all eight checks are done, and on Overview afterwards.
The Setup tab is a checklist called Finish Smart Rostering setup. It shows how many checks are done, for example 3/8, and a Next recommended action. Choose a check to see What the system checked, any Blockers, and a button that takes you to the right screen. Choose Refresh setup after you make a change.
A check is Done, Current (do this next), Blocked (something is missing) or Locked (an earlier check comes first).
Fields in step 1 Field What it means 1. Subscription feature Smart Rostering is available to your organisation, which needs an active subscription or trial. 2. Organisation settings Smart Rostering is switched on for the organisation and its timings are in range. Covered in step 2 below. 3. Rule weights At least one weight is active, so staff can be ranked. Covered in step 2 below. 4. Site enablement At least one active site has Smart Rostering on. Covered in step 3 below. 5. Site staff Every site with Smart Rostering on has at least one active staff member on its team. Covered in step 3 below. 6. Active template with shifts Every site with Smart Rostering on has an active template with at least one shift. Covered in step 4 below. 7. Open roster period Every site with Smart Rostering on has a roster period that is current or in the future. Covered in step 5 below. 8. First run BondiByte has completed one successful run. Covered in step 6 below. Note: In the screenshot, setup is already finished, so there is no Setup tab. Yours shows it first until every check is done. The checklist's suggested fix locations use older menu names, such as Smart Rostering > Organisation settings. They mean the tabs under Configuration > Rostering rules.
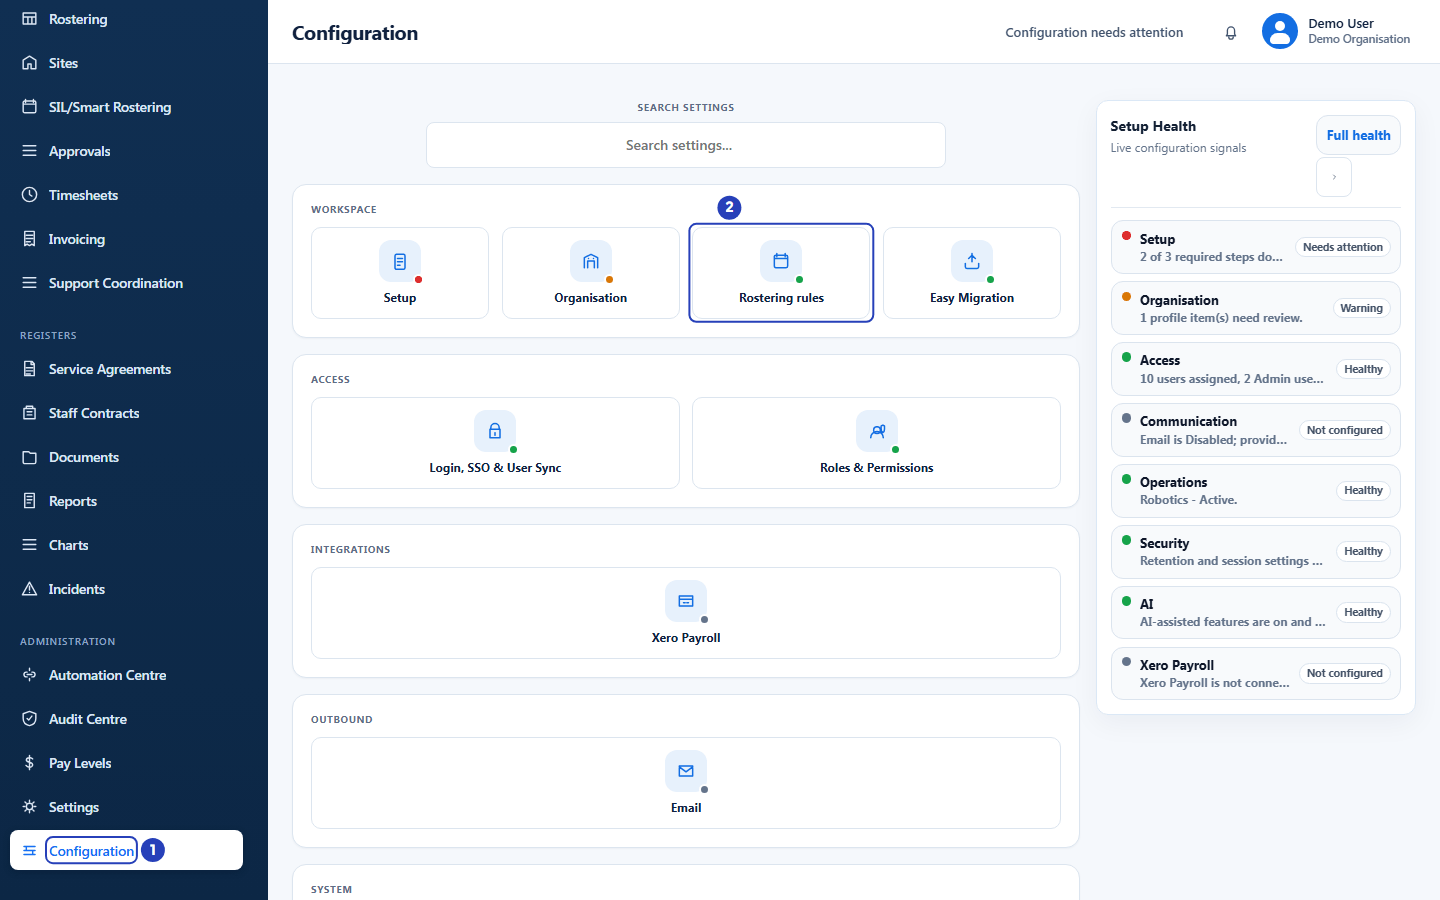
Choose Configuration (1), then the Rostering rules card (2). -
Switch on Smart Rostering and choose the rules (checks 1 to 3)
1 Open Organisation Settings, tick Enable Smart Rostering, check the timings and choose Save organisation settings. See Smart Rostering organisation settings.
2 Open Rules & Weights, choose a preset and choose Save weights. See Rules and Weights.
-
Switch on each site and build its team (checks 4 and 5)
1 Open the site, choose Site settings and switch on Enable smart rostering automation for this site. Choose Save site automation.
2 On the same site, choose Staff and Assign staff until the site has its team. Add at least one client too.
Repeat for each site you want rostered. See Prepare sites for Smart Rostering.
-
Build the first fortnight and give each site a template (check 6)
First build the site's first fortnight by hand. On SIL/Smart Rostering, choose the site, choose + Add shift and tick Repeat this shift to create each regular shift across the period in one go. Repeat this shift stays available while the site has no active pattern, even though Smart Rostering is switched on.
Then, in the roster period that holds the shifts to repeat, open More roster actions, choose Select shifts, tick the shifts and choose Create pattern. In Automation starts from roster period, choose the first period BondiByte should build by itself.
Important: If some steps for the start period you choose are already due, the window warns that work may be processed straight away. Choose a later period if you are not ready.
Tip: Once the pattern is active, Repeat this shift is greyed out for the site and says Managed by the site's active Smart Rostering pattern.
-
Check there is an open roster period (check 7)
BondiByte creates roster periods itself while Enable automatic roster periods is on in the organisation settings. If it is off, create the next period for the site on SIL/Smart Rostering with Create roster period.
-
Let the first run happen (check 8)
This check is done after one successful run. It happens by itself on the first planned Shift Assignment Task date. To finish setup sooner, open SIL/Smart Rostering, choose the site and a roster period, open More roster actions and choose Run smart rostering. A manual run builds that period straight away.
The run is listed on the Generation Runs tab. See Generation runs.
Note: A run builds a draft roster. Unless the site publishes by itself, a manager reviews it before it goes to staff.
-
Check each site shows Ready
Choose the Sites tab.
1 Look at Readiness for each site you set up. If a site shows Needs attention, open it and add the missing client or team member. See Check readiness for what each value means.
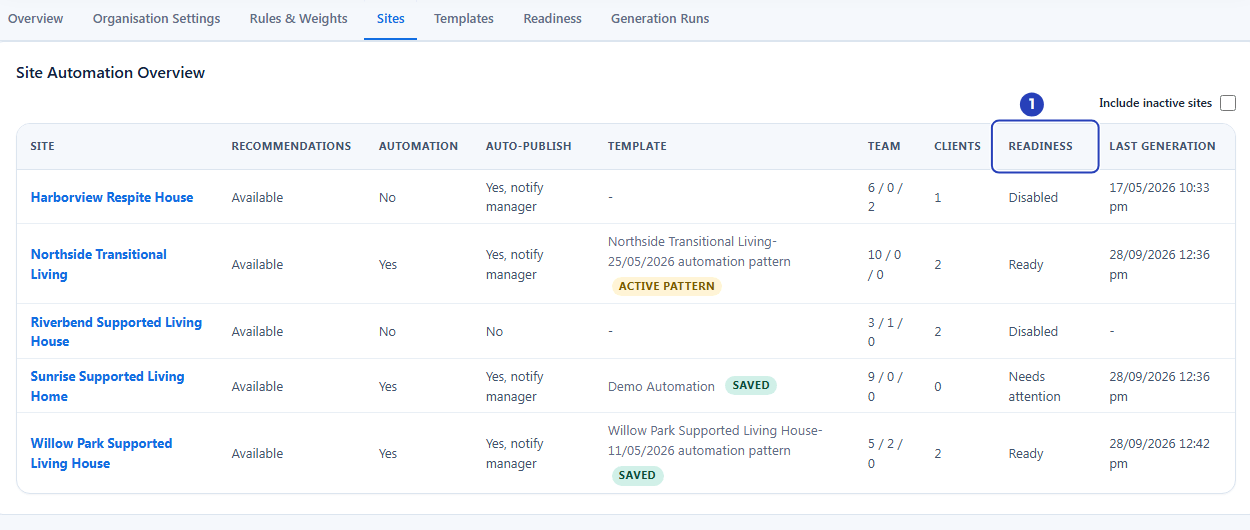
Check the Readiness column (1) for each site you set up. -
Confirm BondiByte has planned your roster periods
Choose the Overview tab.
1 The tiles at the top show whether Smart rostering is On, how many sites use automation and how many Templates you have.
2 Automation Manager shows when BondiByte last checked for due steps (Last check) and when it will check next.
3 Under Upcoming Automation Actions, choose a site.
4 Read the table. Each row is a roster period, with the planned date of its Shift Creation Task, Interest Request Task, Shift Assignment Task and Publish Task.
A site that does not publish by itself shows Not enabled for site under Publish Task and a Manual Action status, because a manager publishes.
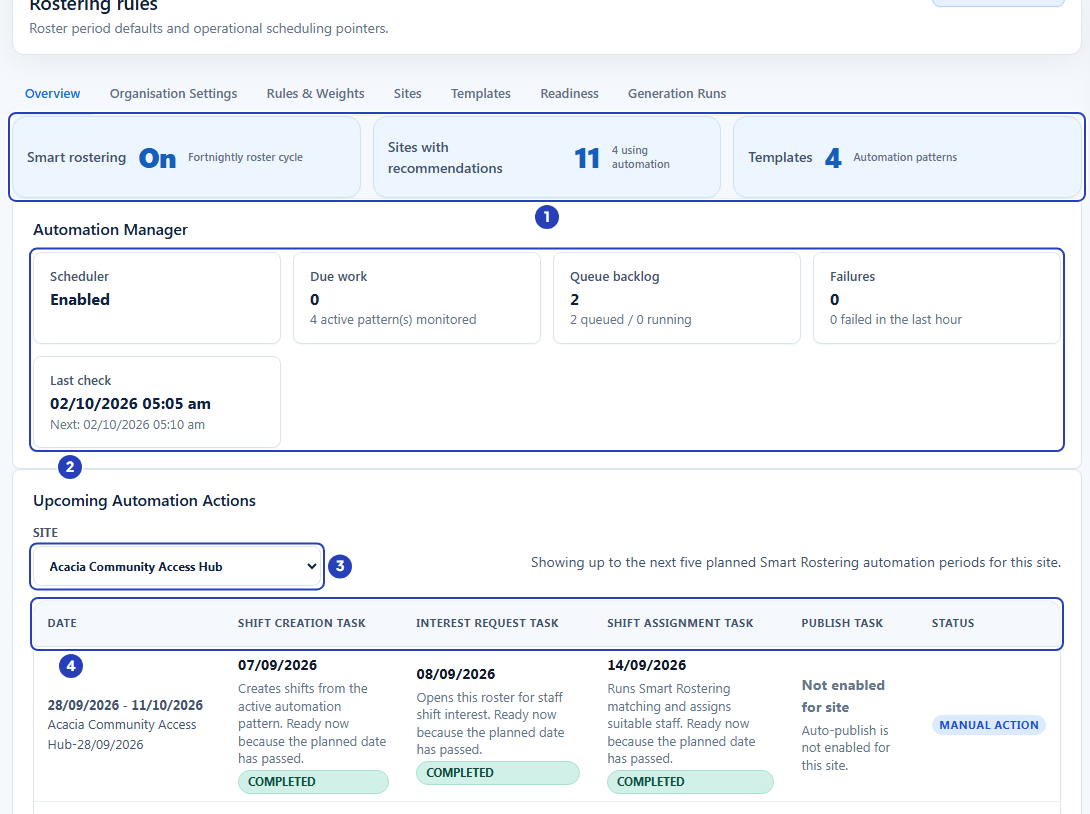
The summary tiles (1), the Automation Manager (2), the site list for Upcoming Automation Actions (3) and the table of planned periods (4).
What happens next
When all eight checks are done, the Setup tab is hidden and the workspace opens on Overview.
From then on BondiByte plans every upcoming roster period itself and builds it on the planned dates. You review each draft and publish it. See How Smart Rostering builds a roster.
You can change any setting later. Changes to timing apply to roster periods planned after the change.
Important notes
Important: Smart Rostering builds the roster and a manager reviews it. It applies only the rules and weights your organisation has set.
Good practice
- Work through the checks in order. A check stays Locked until the one before it is done.
- Finish one site completely, with its team, clients and template, before you switch on the next, so any problem is easy to trace.
- After you change something on another screen, come back and choose Refresh setup to see the check turn Done.
Troubleshooting
I cannot see the Setup tab.
Why it happens: The tab is shown only while setup is unfinished, and only to people who can open every tab of the Rostering rules page.
What to do: Use the Overview tab to see how Smart Rostering is doing. If you expected the checklist, ask an Owner or Admin to check your role.
The Setup tab says Setup progress could not load.
Why it happens: Smart Rostering is not available because your organisation's subscription or trial is not active, or the page could not reach BondiByte.
What to do: Choose Retry. If it keeps failing, contact BondiByte support.
Choosing Run smart rostering shows This automation is not enabled for your organisation.
Why it happens: Smart Rostering automation is off in Account settings > Automation & Capacity Controls, so check 8 cannot finish and BondiByte does not build rosters by itself.
What to do: An Owner or Admin switches Smart Rostering automation on. See Automation Capacity.
A check shows Locked.
Why it happens: An earlier check is not done yet.
What to do: Do the earlier checks in order. The next one opens as soon as the one before it is Done.
A check shows Blocked.
Why it happens: Something is missing. The Blockers list under the check names it.
What to do: Read the Blockers, use the button under the details to go to the right screen, make the change, then choose Refresh setup.
I fixed something but the check is not Done.
Why it happens: The checklist has not refreshed yet.
What to do: Choose Refresh setup. While the Setup tab is open it also refreshes by itself.
A blocker says a site has no open current or future roster period.
Why it happens: The message reads <site> has no open current or future roster period.
What to do: Turn on Enable automatic roster periods in the organisation settings, or create the next roster period for the site.
A blocker says a site does not have an active automation pattern, or has no active shifts in it.
Why it happens: The site has no template yet, or its template has no shifts.
What to do: Build one fortnight by hand first, using Repeat this shift in the Add shift window. Then create a template from the roster. See Build a roster template.
A blocker says a site has no active staff assigned.
Why it happens: No active staff member is on the site team.
What to do: Open the site, choose the Staff tab and then Assign staff. See Prepare sites for Smart Rostering.