

Who this is for
This guide is written for Owner and Admin.
Before you begin
- You are signed in to BondiByte on a computer.
- You know which built-in template is closest to the record you want to keep. The five built-in templates are Behaviour Monitoring, Food & Fluid, General Observation, Medication Administration and Sleep Monitoring.
Steps
The screenshots show a demonstration organisation with made-up names. Your own screens show your organisation's details. Select a screenshot to open it full size.
-
Go to Configuration > Chart Library
1 In the left menu, under Administration, choose Configuration. The Configuration page opens.
2 Under System, choose Chart Library. The Chart Library Settings page opens.
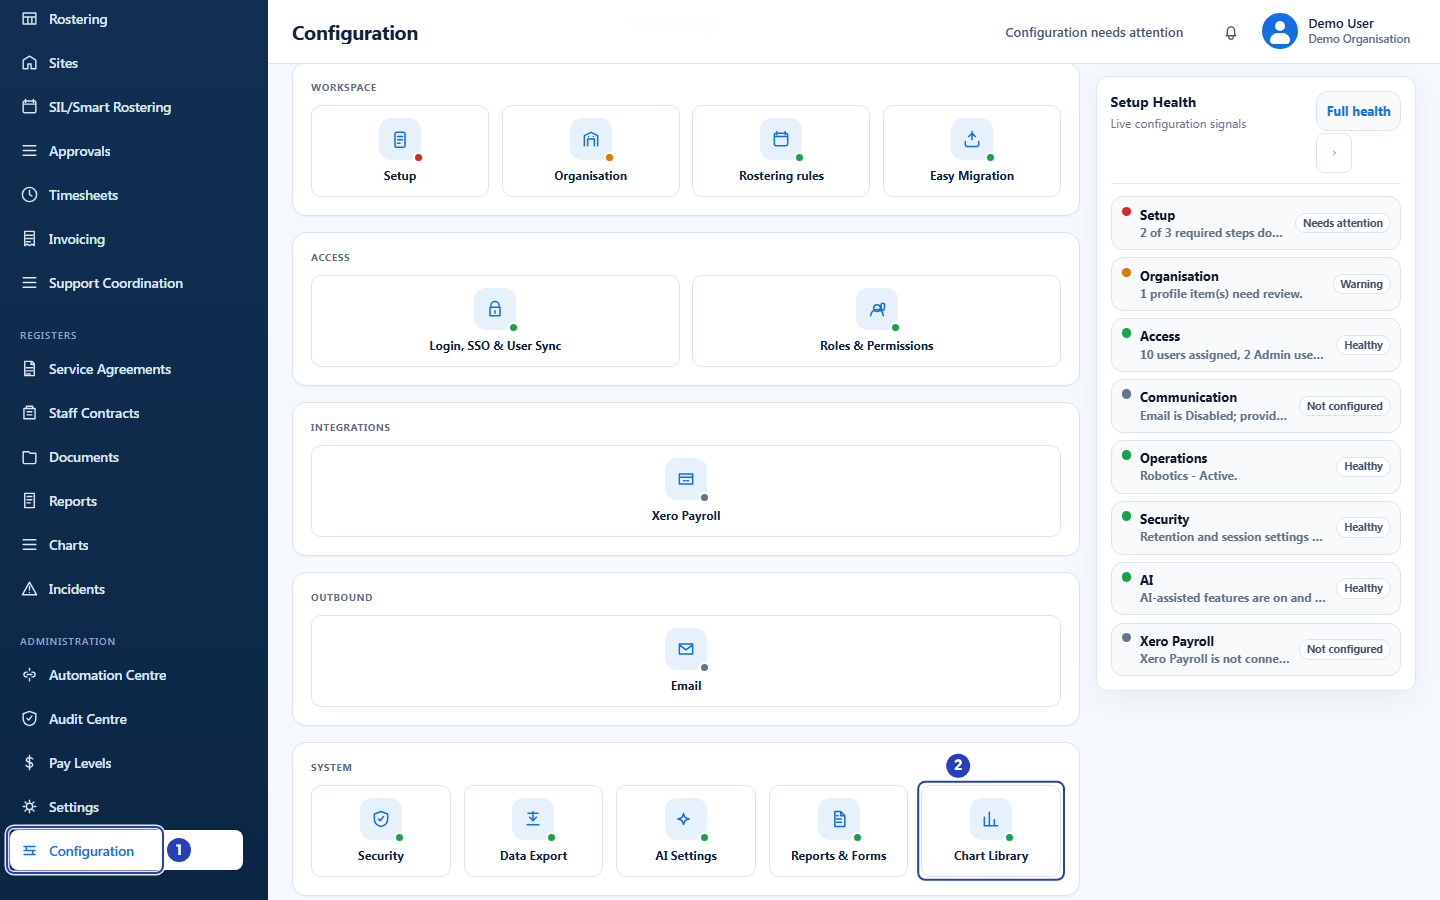
Choose Configuration in the left menu (1), then Chart Library under System (2). -
Open the Built-in templates tab
1 Choose the Built-in templates tab. The five BondiByte templates are listed, each marked Built-in.
2 Find the template closest to what you need, for example Food & Fluid. Choose Preview on its row to look at it first.
Note: A built-in template cannot be edited, and it cannot be given to a client directly. You always clone it first, then use your copy.
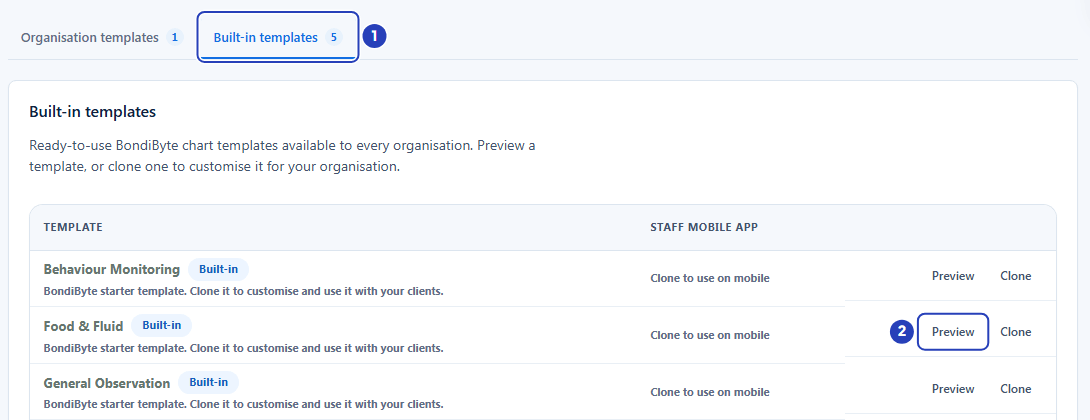
Choose the Built-in templates tab (1), then Preview on the template you are interested in (2). -
Preview the template
1 Look through the fields the template includes. The preview shows how the form looks and does not save any answers.
2 Choose Desktop width or Narrow width to check how the form lays out on a narrower screen.
3 Choose Close when you have finished.
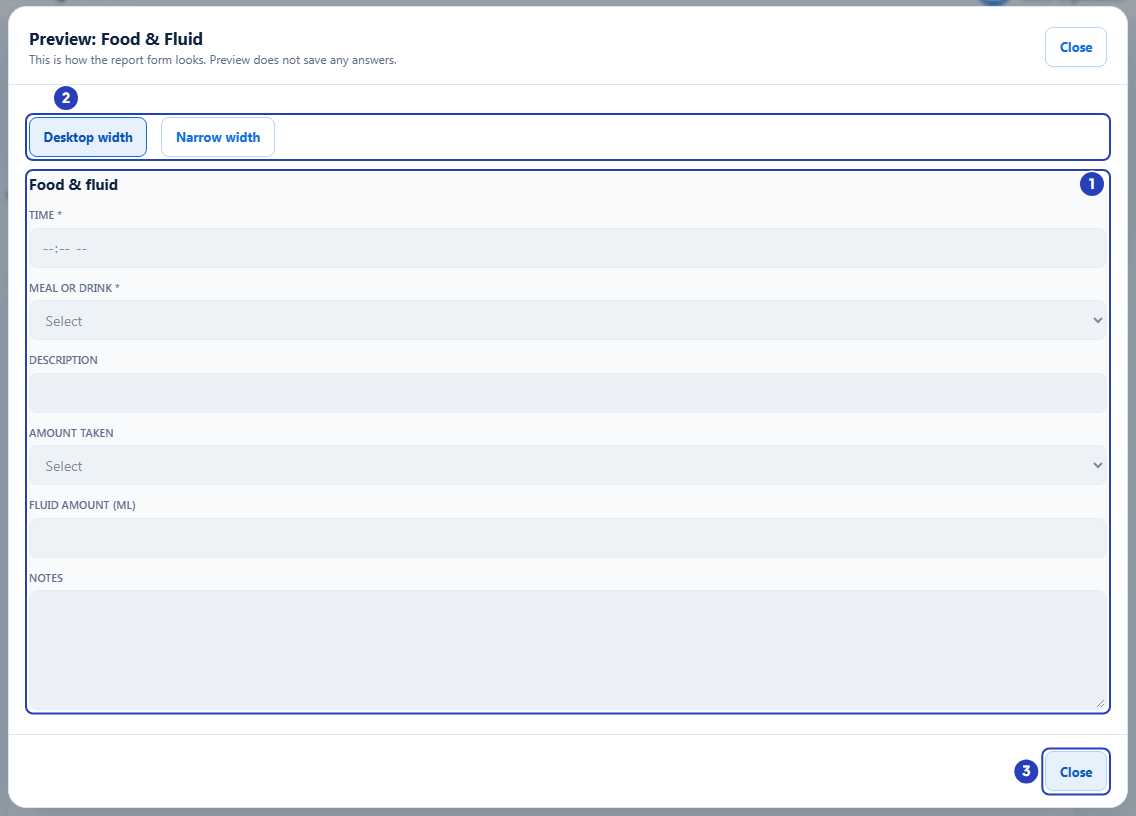
Look through the fields (1), check the layout with the width buttons (2), then choose Close (3). -
Clone the template
On the row of the template, choose Clone. A window opens with the title Duplicate followed by the template's name.
1 In Name for the copy, type a name your team will recognise. It starts as the original name with (Copy) added.
2 In Description, replace the starter wording with what your organisation uses this Chart for.
3 Choose Create copy. Choose Cancel instead to close the window without creating anything.
Fields in step 4 Field What it means Name for the copy Required. It starts as the original name with (Copy) added. Each Chart template in your organisation needs its own name. A name that differs only in capital letters counts as the same name, and the name of an archived template counts too. Create copy stays greyed out while the box is empty. Description Optional. It starts with the original template's description, which is BondiByte's starter wording for a built-in template. Replace it with what your organisation uses the Chart for. It helps your team choose the right template later. 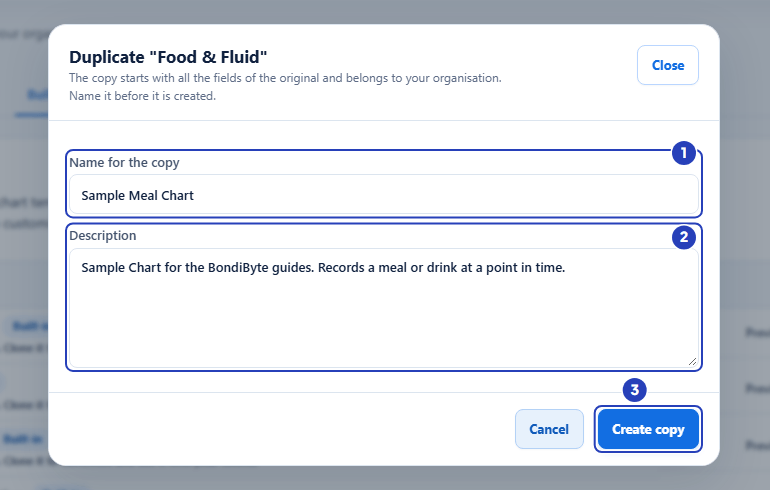
Name the copy (1), describe it (2), then choose Create copy (3). -
Check the copy in Organisation templates
A message confirms that the template was cloned. The copy now belongs to your organisation.
1 Choose the Organisation templates tab.
2 Find your copy in the list. Its Status is Draft, Assigned to says Not assigned to a client yet, and its Staff mobile app switch is off.
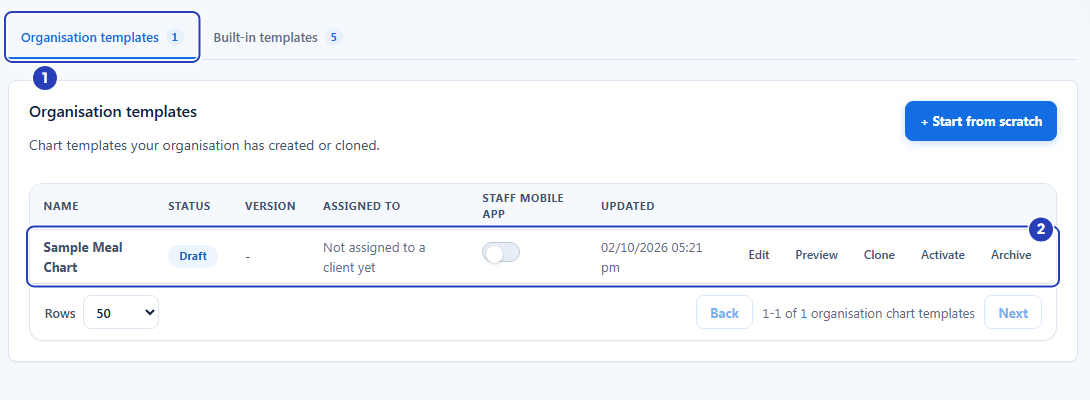
Choose the Organisation templates tab (1) and find your copy, shown as a Draft (2). -
Activate the copy
On the row of your copy, choose Activate. A window asks Activate this chart template?
1 Read the message. Activating creates version 1 and makes the template available to assign to clients. Entries recorded later keep the version they were recorded on.
2 Choose Activate to confirm. Choose Cancel to keep the copy as a Draft.
Tip: To change the fields before you activate, choose Edit on the row instead. The Edit button opens the Chart template builder. See Create an organisation Chart template.
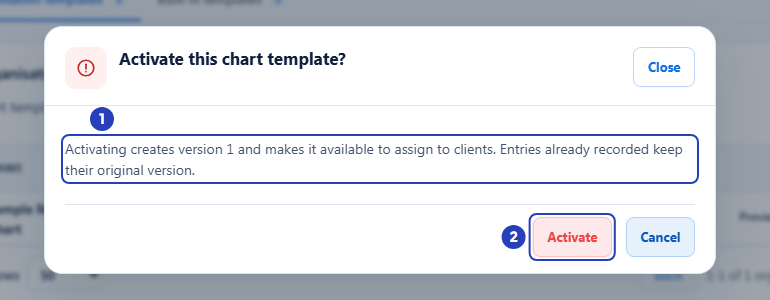
Read what activating does (1), then choose Activate (2). -
Check that the template is Published
1 A message confirms that the template was activated as version 1.
2 In the row, the Status is now Published and the Version is v1.
3 The row now offers Assign to client. Use it to give the Chart to a client.
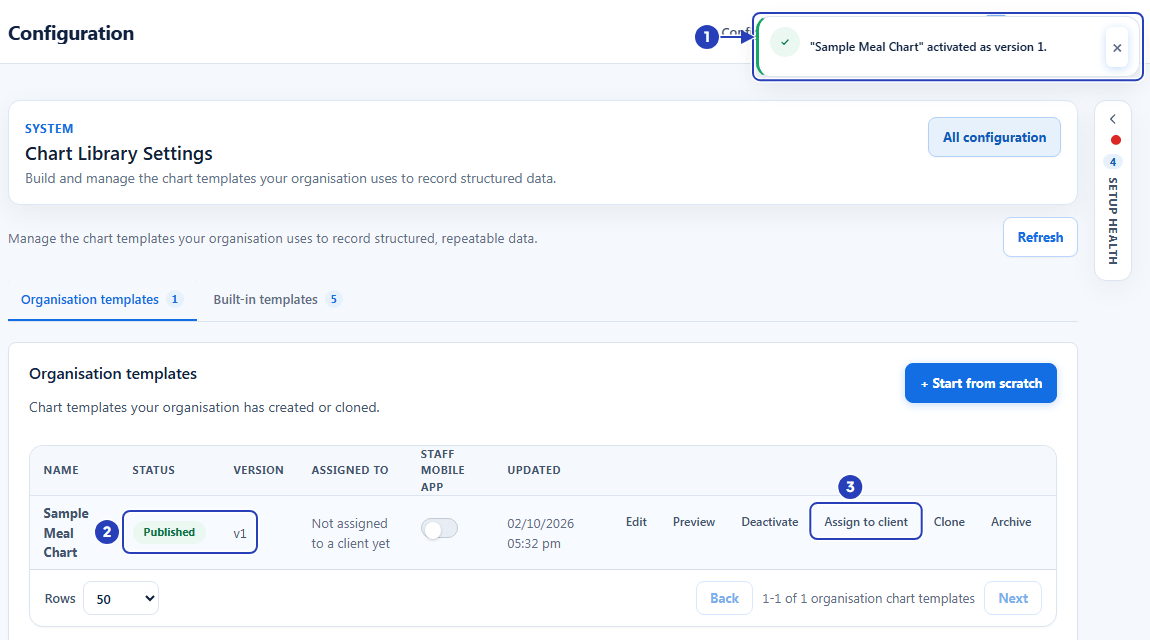
The confirmation message (1), the Published status and version (2), and the new Assign to client button (3).
What happens next
Your copy belongs to your organisation. The built-in template it came from is unchanged, and other organisations never see your copy.
Cloning does not give the Chart to anyone. A Chart is only available on the Staff App for the clients it is assigned to, once it is active. The next step is Assign a Chart to a client.
To change the fields of your copy, choose Edit on its row in Organisation templates. Changes you save are kept as a draft until you publish them, and each publish makes a new version. Entries already recorded keep the version they were recorded on.
Important notes
Important: A built-in template cannot be edited or assigned to a client. The Built-in templates tab offers only Preview and Clone.
Tip: To start with no template, use Start from scratch on Organisation templates. See Create an organisation Chart template.
Good practice
- Preview a built-in template before you clone it, and choose Edit on your copy to adjust its fields before you activate it. Each change you publish later creates a new version.
- Name the copy for what it records, for example Fluid intake (Riverside house), instead of keeping (Copy) in the name. Names must be unique, archived templates included.
- If you clone Medication Administration, its medication or dose list is set for each client, so add that client's options when you assign the Chart.
Troubleshooting
The Clone button is greyed out.
Why it happens: Your role does not include permission to manage chart templates.
What to do: Ask an Owner or Admin to clone the template for you, or to check your role.
The Chart Library says You do not have permission to view the Chart Library.
Why it happens: Your role does not include permission to view chart templates.
What to do: Ask an Owner or Admin to give you the Chart Templates permission.
A message says A chart template with this name already exists in your organisation. Choose a different name.
Why it happens: Every Chart template needs its own name, and the name of an archived template counts.
What to do: Type a different name in Name for the copy. To find an archived template, turn on Show archived on Organisation templates.
I cannot find my copy after choosing Create copy.
Why it happens: The page stays on the Built-in templates tab. Your copy is on the other tab.
What to do: Choose the Organisation templates tab.
There is no Assign to client button on my copy.
Why it happens: Only a template with the status Published can be assigned. A new copy is a Draft.
What to do: Choose Activate on the row, then confirm.